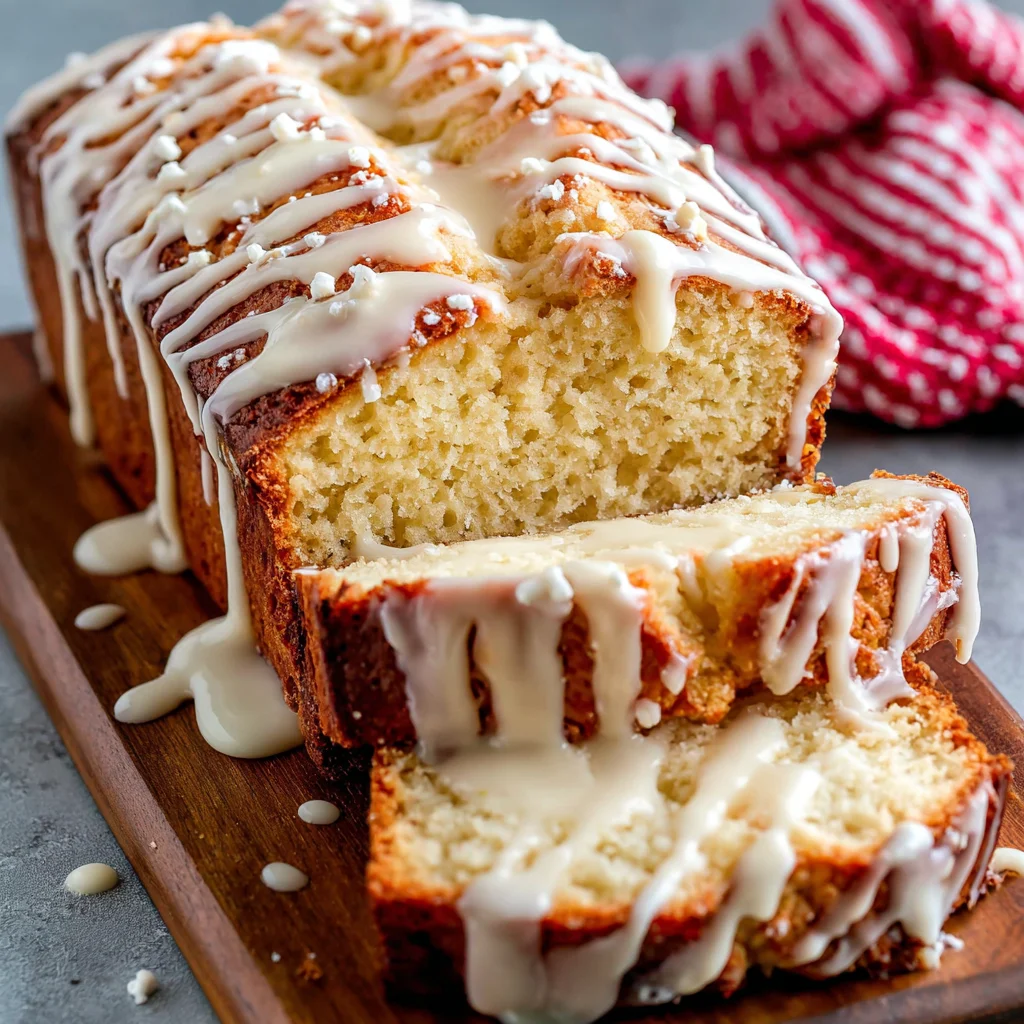
The aroma of warm spices and creamy eggnog fills your kitchen. Golden-brown, moist, and bursting with holiday cheer, a loaf of Eggnog Bread With Glaze sits cooling on the wire rack, its surface glistening with a luscious, sweet glaze. This isn’t just bread; it’s a comforting hug in baked form, perfect for chilly evenings and festive gatherings. Imagine sinking your teeth into a slice, the tender crumb yielding to the rich, eggnog-infused flavor, followed by the delightful sweetness of the glaze. This Eggnog Bread With Glaze recipe isn’t just about following instructions; it’s about creating a warm, inviting experience in your kitchen, and sharing the delicious results with loved ones. This recipe is designed to be easily adaptable to your skill level, so whether you’re a seasoned baker or a kitchen novice, you’ll find success and joy in creating this festive treat. Prepare to be amazed by the delicious simplicity of this recipe, and the unforgettable taste that will leave everyone asking for more. Let’s embark on this delightful baking journey together!
Why You’ll Love This Eggnog Bread With Glaze Recipe
This Eggnog Bread With Glaze recipe isn’t just another loaf of bread; it’s a culinary experience. There are several reasons why you’ll fall in love with this recipe: first, it’s incredibly easy to make. The simple steps guide you through the process, making it approachable for both beginner and experienced bakers. The process is straightforward, yet yields extraordinary results, providing a sense of accomplishment. Beyond the ease, the flavor is phenomenal. The rich, creamy eggnog flavor beautifully complements the warm spices of nutmeg, cinnamon, and cloves, creating a symphony of holiday tastes. The moist crumb and the sweet, tangy glaze create a textural and flavor sensation that is truly unforgettable. This bread is a versatile masterpiece, perfect for breakfast alongside coffee, as an afternoon snack with tea, or even as a delightful dessert alongside a scoop of vanilla ice cream.
Furthermore, this Eggnog Bread With Glaze recipe offers unmatched convenience. Many of the ingredients are likely already staples in your pantry, minimizing shopping trips. The baking time is manageable, fitting comfortably into a busy schedule. The recipe is also incredibly adaptable. You can easily customize the glaze, experimenting with different levels of sweetness or even adding a hint of vanilla extract. Feel free to adjust the spice levels to match your preferences, creating a truly personalized treat. Lastly, this Eggnog Bread With Glaze makes a stunning presentation. The golden-brown loaf, glistening under the smooth glaze, is a beautiful centerpiece for any holiday gathering or a simple family meal. The aroma alone is enough to get everyone excited for a taste of this delicious bread.
Why You Should Try This Eggnog Bread With Glaze Recipe
Beyond the deliciousness, there are several compelling reasons to try this Eggnog Bread With Glaze recipe. Firstly, it’s a perfect way to celebrate the holiday season. The flavors evoke the warmth and comfort associated with winter holidays, making it the ideal addition to your festive baking repertoire. Sharing this bread with family and friends creates lasting memories, transforming a simple baking project into a meaningful experience. This recipe is also a great opportunity to experiment with baking. It’s a relatively simple recipe, making it a perfect starting point for those new to baking or those wanting to practice their skills. The clear instructions and tips included will guide you through every step of the way, building your confidence in the kitchen.
In addition, this Eggnog Bread With Glaze recipe is incredibly cost-effective. The ingredients are readily available and relatively inexpensive, making it a budget-friendly option for delicious holiday treats. Furthermore, the recipe makes a generous loaf, providing plenty to share with friends, family, or to enjoy over several days. This makes it a practical choice, avoiding the need to bake multiple times. Finally, this recipe is a wonderful way to impress your guests. The exquisite taste and beautiful presentation will undoubtedly elevate your holiday gatherings. The unique flavor profile of the eggnog bread, coupled with the inviting glaze, is sure to leave a lasting impression on everyone who tastes it. Try it and witness the magic unfold!
Ingredients and Necessary Utensils for Eggnog Bread With Glaze
Gathering the right ingredients and tools is crucial for baking success. This section details everything you’ll need to create this delicious Eggnog Bread With Glaze. Let’s get started!
Ingredients:
- For the Bread:
- 1 ½ cups (190g) all-purpose flour: Provides the structure for your bread. Consider using cake flour for an even more tender crumb.
- 1 teaspoon baking soda: The leavening agent, crucial for a light and airy texture. Ensure it’s fresh for optimal results.
- ½ teaspoon ground nutmeg: Adds warm, aromatic flavor, quintessential to eggnog. Freshly grated nutmeg offers a superior taste.
- ¼ teaspoon ground cinnamon: Complements the nutmeg, adding depth and warmth to the flavor profile. Use Ceylon cinnamon for a sweeter, milder taste.
- ¼ teaspoon ground cloves: Contributes a subtle spiciness, balancing the sweetness. A pinch more or less, depending on your spice preference.
- ½ teaspoon salt: Enhances the flavors and balances the sweetness. Don’t skip this crucial ingredient!
- ½ cup (115g) unsalted butter, softened: Adds richness and moisture. Softened butter is crucial for proper creaming with the sugar.
- 1 ¾ cups (350g) granulated sugar: Provides sweetness and helps create a tender crumb. You can adjust this to your preferred level of sweetness.
- 2 large eggs: Bind the ingredients and add richness. Ensure they are at room temperature for optimal emulsification.
- 1 teaspoon vanilla extract: Adds warmth and complexity. Pure vanilla extract offers a superior flavor.
- 1 cup (240ml) eggnog: The star ingredient! Choose your favorite brand or make your own for an even more personalized touch.
- For the Glaze:
- 1 cup (120g) powdered sugar: Creates a smooth, sweet glaze. Sift it for a lump-free glaze.
- 2-4 tablespoons eggnog: Thins the powdered sugar to create a pourable glaze. Adjust the amount for your desired consistency.
Utensils:
- 9×5 inch loaf pan: The perfect size for this recipe. Grease and flour it well to prevent sticking.
- Medium bowl: For whisking the dry ingredients.
- Large bowl: For creaming the butter and sugar.
- Electric mixer (handheld or stand): Makes creaming the butter and sugar much easier.
- Rubber spatula or wooden spoon: For combining the wet and dry ingredients.
- Wooden skewer or toothpick: For testing the doneness of the bread.
- Wire rack: For cooling the bread completely.
- Whisk: For making the glaze.
- Measuring cups and spoons: For accurate ingredient measurements.
Detailed Recipe Steps for Eggnog Bread With Glaze
Let’s bake! Follow these step-by-step instructions to create your delicious Eggnog Bread With Glaze.
- Preheat & Prep: Preheat your oven to 350°F (175°C). Grease and flour a 9×5 inch loaf pan generously. This step prevents sticking and ensures easy removal of the bread after baking.
- Dry Ingredients: In a medium bowl, whisk together the flour, baking soda, nutmeg, cinnamon, cloves, and salt. Whisk well to ensure even distribution of the leavening agent and spices. This prevents clumps in your batter.
- Cream Butter & Sugar: In a large bowl, cream together the softened butter and sugar until light and fluffy. Use an electric mixer for best results. This step incorporates air into the batter, leading to a lighter, airier texture.
- Add Eggs & Vanilla: Beat in the eggs one at a time, mixing well after each addition. Then, stir in the vanilla extract. Make sure the eggs are fully incorporated before adding the dry ingredients.
- Combine Wet & Dry: Gradually add the dry ingredients to the wet ingredients, alternating with the eggnog, beginning and ending with the dry ingredients. Mix until just combined; do not overmix. Overmixing develops gluten, resulting in a tough bread. Mix gently until just combined.
- Bake: Pour the batter into the prepared loaf pan and bake for 50-60 minutes, or until a wooden skewer inserted into the center comes out clean. Start checking for doneness around the 50-minute mark. Baking time may vary slightly depending on your oven.
- Cool: Let the bread cool in the pan for 10 minutes before transferring it to a wire rack to cool completely. This allows the bread to set before handling, preventing it from crumbling.
- Make the Glaze: While the bread is cooling, whisk together the powdered sugar and enough eggnog to create a smooth, pourable glaze. Start with 2 tablespoons and add more if needed to reach your desired consistency. Adjust the eggnog to achieve the perfect consistency.
- Glaze the Bread: Once the bread is completely cool, pour the glaze over the top, letting it drizzle down the sides. Allow the glaze to set before slicing and serving.
Tips and Variations for Eggnog Bread With Glaze
This Eggnog Bread With Glaze recipe is highly adaptable, offering endless possibilities for customization. Here are some helpful tips and variations to make it your own:
- Spice it up: Experiment with different spice combinations. Add a pinch of cardamom, ginger, or allspice for a unique flavor twist.
- Citrus zest: Add the zest of an orange or lemon to the batter for a bright, refreshing note.
- Nuts and dried fruits: Incorporate chopped walnuts, pecans, or dried cranberries for added texture and flavor. Add them to the batter before baking.
- Different glaze: Get creative with the glaze! Try a cream cheese frosting, a bourbon-infused glaze, or even a simple powdered sugar glaze with a touch of vanilla extract. A maple glaze also pairs well with eggnog flavors.
- Make it vegan: Substitute the butter with vegan butter, the eggs with flax eggs (1 tbsp flaxseed meal mixed with 3 tbsp water per egg), and use a vegan eggnog. Many brands offer delicious vegan eggnog alternatives. Be sure to use a baking powder that is appropriate for vegan baking.
- Gluten-free version: Use a gluten-free all-purpose flour blend. Ensure that your chosen blend is suitable for baking. You may need to adjust the baking time slightly.
- Don’t overmix: Overmixing the batter develops gluten, resulting in a tough bread. Mix only until the ingredients are just combined.
- Check for doneness: Use a wooden skewer or toothpick to check if the bread is fully baked. It should come out clean when inserted into the center.
- Let it cool completely: Allow the bread to cool completely before glazing to prevent the glaze from melting.
Nutritional Values and Benefits of Eggnog Bread With Glaze
(Note: Nutritional information is an estimate and may vary depending on the specific ingredients used. Use a nutrition calculator for precise values based on your ingredient brands.)
While this Eggnog Bread With Glaze is undeniably indulgent, let’s explore the nutritional aspects and potential health benefits of some of its key components:
- Eggnog: Provides calcium and protein from the milk and eggs (depending on the recipe, some eggnog is dairy free). However, it’s also high in sugar and fat, so moderation is key.
- Whole wheat flour (alternative): Substituting all-purpose flour with whole wheat flour adds fiber, improving digestion and potentially lowering cholesterol levels.
- Spices (nutmeg, cinnamon, cloves): These spices offer antioxidant properties and may have anti-inflammatory effects. They’re also packed with flavor!
- Butter: Contains fat-soluble vitamins like A, D, E, and K. However, it’s high in saturated fat, so consume in moderation.
Remember that this bread is best enjoyed as an occasional treat, not a staple in a daily diet. Balance is key to a healthy lifestyle.
FAQs about Eggnog Bread With Glaze
Can I freeze Eggnog Bread With Glaze?
How long does Eggnog Bread With Glaze last at room temperature?
What can I substitute for eggnog in this recipe?
Can I make this Eggnog Bread With Glaze ahead of time?
Is this Eggnog Bread With Glaze recipe suitable for beginners?
Conclusion: Indulge in the Delight of Eggnog Bread With Glaze
This Eggnog Bread With Glaze recipe is more than just a recipe; it’s an experience. From the delightful aroma of warm spices to the rich, creamy taste and satisfying glaze, this bread is a true holiday treat. We’ve explored the simple steps, the adaptable variations, and the delicious reasons why you should add this recipe to your baking repertoire. Whether you’re a seasoned baker or just starting your culinary journey, this recipe is designed to bring you joy and delicious results. So, gather your ingredients, preheat your oven, and prepare to be amazed by the wonderful flavors and textures of this festive bread. Don’t forget to share your baking experience in the comments below and share this recipe with your friends and family!
Now that you’ve mastered this delightful Eggnog Bread With Glaze, why not explore more delicious recipes? Check out these amazing treats on our website: Pumpkin Cookies with Creamy Frosting and our other delectable recipes. Happy baking!
We encourage you to share your baking adventures on Pinterest and tag us! Let’s connect and celebrate the joy of baking together. Happy Holidays!
Eggnog Bread with Creamy Glaze
Ingredients
Equipment
Method
- Preheat oven to 350°F (175°C). Grease and flour a 9x5 inch loaf pan.
- In a medium bowl, whisk together flour, baking soda, nutmeg, cinnamon, cloves, and salt.
- In a large bowl, cream together softened butter and sugar until light and fluffy using an electric mixer.
- Beat in eggs one at a time, then stir in vanilla extract.
- Gradually add dry ingredients to wet ingredients, alternating with eggnog, beginning and ending with dry ingredients. Mix until just combined; do not overmix.
- Pour batter into prepared loaf pan and bake for 50-60 minutes, or until a wooden skewer inserted into the center comes out clean.
- Let bread cool in the pan for 10 minutes before transferring to a wire rack to cool completely.
- While bread is cooling, whisk together powdered sugar and enough eggnog to create a smooth, pourable glaze. Start with 2 tablespoons and add more if needed.
- Once bread is completely cool, pour glaze over the top, letting it drizzle down the sides.