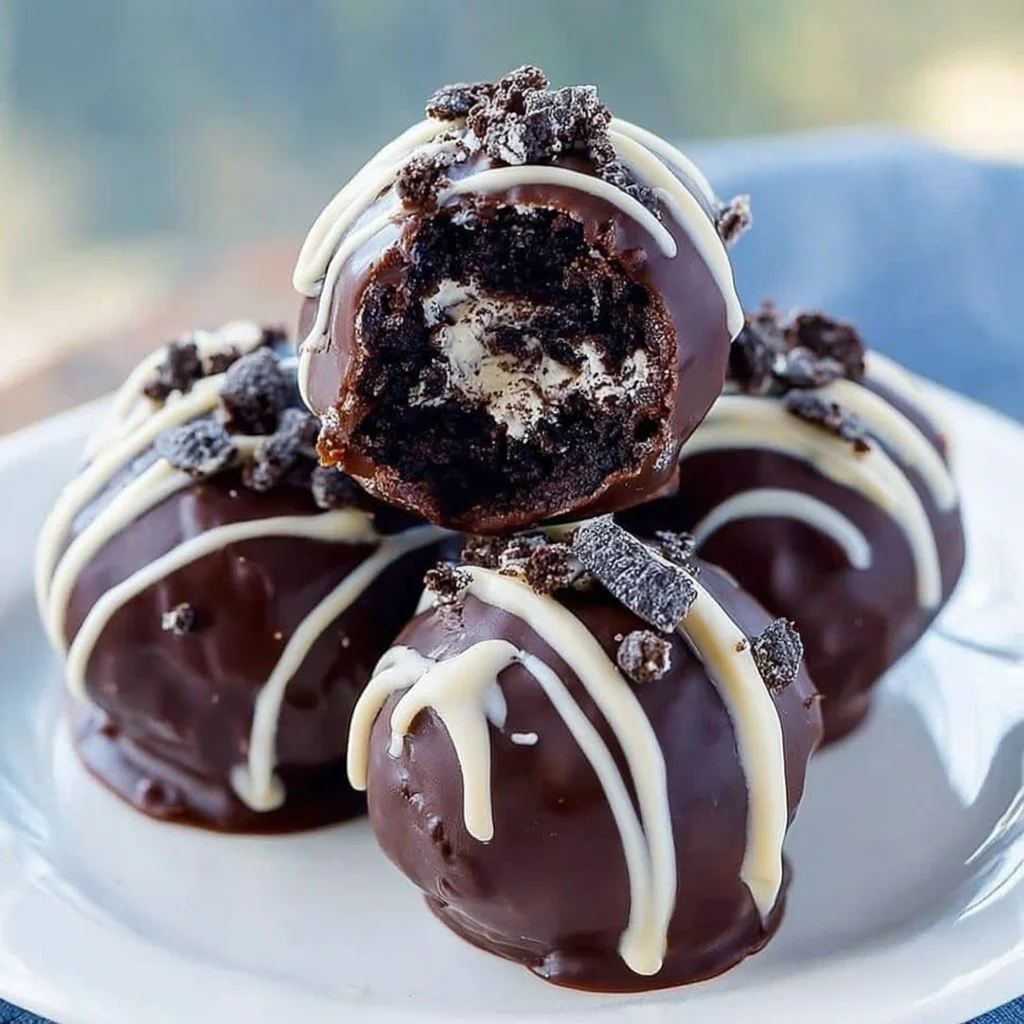
Welcome to the world of simple, delicious, and utterly addictive desserts! If you’re searching for a treat that delivers maximum flavor with minimum effort, look no further than these spectacular 3-Ingredient No-Bake Oreo Balls. Also known as Oreo Truffles, this recipe is a cornerstone of holiday baking, potluck planning, and emergency dessert cravings. They are creamy, crunchy, rich, and ridiculously easy requiring only Oreos, cream cheese, and chocolate.
Forget the stress of ovens, mixing flours, or complex pastry techniques. This ingenious recipe harnesses the magic of cream cheese to bind crushed Oreo cookies into a dense, delightful dough, which is then dipped in glossy, tempered chocolate. Whether you are a novice baker or a seasoned dessert enthusiast, these no-bake wonders are guaranteed to be a hit. We’ll guide you through every step, ensuring your final result is professional-looking, perfectly textured, and intensely flavorful. Get ready to impress your friends and family with the easiest treat they’ve ever tasted!
Why You’ll Fall Head Over Heels for These Easy Oreo Truffles
The success of the 3-Ingredient No-Bake Oreo Balls recipe isn’t just about the flavor it’s about the convenience and the sheer joy derived from such a simple creation. There are countless reasons why this recipe has become a perennial favorite in kitchens across the globe, appealing to everyone from busy parents looking for a quick fix to entertainers needing a make-ahead dessert.
Unbeatable Simplicity: Three Ingredients is All You Need
In the culinary world, recipes often promise simplicity only to deliver a lengthy list of pantry staples. Not here. This is a genuinely minimalist approach to dessert perfection. You only need the cookies, the binder, and the coating. This reduces preparation time, minimizes grocery shopping fuss, and ensures that even if you have minimal experience, you can achieve stellar results. Focusing on just three core components means the quality of each ingredient truly shines through, offering a pure, unadulterated flavor experience.
No Oven Required: The Magic of No-Bake Desserts
Especially during the busy holiday season or the heat of summer, relying on your oven can be cumbersome. The “No-Bake” designation is a game-changer. It means less time waiting, no risk of burning, and a cooler kitchen environment. The entire process from crushing the cookies to chilling the final product is hands-on and straightforward. The lack of baking also contributes to the unique, dense, and fudgy texture of the truffle filling, which contrasts beautifully with the crisp snap of the chocolate shell.
Perfect for Gifting and Entertaining
If you need a versatile dessert that looks as good as it tastes, the 3-Ingredient No-Bake Oreo Balls are your answer. They are inherently portion-controlled, making them ideal for dessert platters, party favors, or homemade gifts. Their sturdy nature means they travel well, and they look stunning when decorated. You can easily adapt the decorations to any theme holiday sprinkles for Christmas, colorful drizzles for birthdays, or sophisticated dustings of cocoa powder for an elegant dinner party.
Furthermore, these Oreo truffles are naturally make-ahead friendly. Since they must be chilled to firm up, you can easily prepare them days in advance. This flexibility is invaluable when planning large gatherings, allowing you to check dessert off your list early and reduce day-of stress. The rich combination of chocolate and cream cheese ensures that these little treats are satisfying without being overly heavy, making them the ideal sweet finish to any meal.
Why You Should Make These 3-Ingredient No-Bake Oreo Balls Today
Beyond the fundamental advantages of simplicity and convenience, there are compelling experiential and logistical reasons to tackle this specific recipe for Oreo Truffles right now. This isn’t just another dessert; it’s a foundational recipe that empowers confidence in the kitchen and guarantees a crowd-pleasing outcome every single time.
A Guaranteed Crowd-Pleaser for All Ages
Oreo cookies are arguably one of the most universally loved treats. By combining the beloved flavor of America’s favorite sandwich cookie with the luxurious richness of cream cheese and a sleek chocolate coating, you create a dessert that transcends age and preference. Children adore the rich, chocolatey interior, while adults appreciate the texture and the intense, fudge-like flavor profile. Serving a platter of these 3-Ingredient No-Bake Oreo Balls guarantees empty plates and requests for the recipe. They are a safe bet when entertaining guests whose dietary preferences you might not fully know (barring major allergies).
Ultimate Versatility and Customization
While the base recipe only requires three ingredients, it serves as an incredibly stable canvas for creative customization. This versatility ensures you never get bored and can adapt the treat for any season or celebration. Thinking of Halloween? Dip them in orange candy melts and pipe spiderwebs. Hosting a summer party? Mix in a little key lime zest before rolling. For a sophisticated upgrade, consider using dark chocolate wafers and finishing with a sprinkle of sea salt. The ability to pivot the flavor and aesthetic so easily makes this a continually relevant recipe.
For those looking for other simple, crowd-pleasing three-ingredient recipes, check out my guide on 3-Ingredient Peanut Butter Balls, which offers a similar approach to effortless confectionery success.
A Fantastic Kitchen Project for the Family
Because there is no heat involved until the chocolate melting phase, these No-Bake Oreo Balls are an excellent, safe, and fun activity to involve children in the kitchen. Kids can help crush the cookies (a fantastic way to relieve stress!), roll the mixture into neat balls, and, most importantly, participate in the decorating phase. This type of simple baking project encourages creativity, teaches basic measuring and mixing skills, and culminates in a delicious reward that everyone worked to create. The tactile experience of rolling the smooth dough is especially satisfying.
The Economics of Deliciousness
Considering the high quality and intense richness of the final product, these Oreo truffles are surprisingly inexpensive to make. The ingredients are standard, readily available, and typically budget-friendly. Compared to purchasing gourmet truffles or high-end boxed chocolates, making your own 3-Ingredient No-Bake Oreo Balls offers significant cost savings without compromising on taste or presentation. This makes them an economical choice for large volume production, such as making treats for a school bake sale or creating multiple gifts.
Essential Ingredients and Equipment for Perfect Oreo Balls
Achieving the perfect texture and coating for your 3-Ingredient No-Bake Oreo Balls hinges on using the right ingredients and ensuring your tools are ready. While the ingredient list is short, quality and preparation matter immensely.
The Core Three Ingredients
Precise measurements and the condition of the ingredients are vital for the proper dough consistency.
- 1 (14.3 ounce) package of Oreo Cookies: This standard package contains approximately 36 cookies, including the cream filling. It is absolutely crucial to use the entire cookie both the chocolate wafer and the sweet cream center. The cream center is essential as it provides additional fat and moisture, aiding in the binding process and enhancing the final flavor. Using regular Oreos provides the classic flavor profile, but feel free to experiment with seasonal or flavored Oreos (like peppermint or golden) for unique variations.
- 1 (8 ounce) block of full-fat cream cheese: The cream cheese acts as the binding agent, transforming the dry cookie crumbs into a pliable, truffle-like dough. Crucially, the cream cheese must be completely softened to room temperature. If the cream cheese is cold, it will not incorporate evenly, leading to a lumpy dough and making the rolling process frustratingly difficult. Room temperature cream cheese mixes seamlessly with the fine crumbs, creating that luxurious, fudgy texture we are aiming for. Always use full-fat cream cheese for the best results; reduced-fat options may introduce too much water, altering the dough’s consistency.
- 16 ounces of chocolate melting wafers, candy melts, or high-quality chocolate chips: The quality of your coating determines the final aesthetic and mouthfeel.
- Recommendation 1: Chocolate Melting Wafers (Candy Melts): These are specifically designed for melting and dipping. They contain stabilizers that prevent them from seizing and result in a smooth, glossy finish without the need for complex tempering. They are the easiest option for beginners seeking a professional look.
- Recommendation 2: High-Quality Chocolate Chips: While convenient, standard chocolate chips often contain fewer cocoa solids and are formulated to hold their shape, making them thicker and sometimes harder to melt smoothly. If using chips, you may need to add 1 teaspoon of vegetable oil or shortening (like coconut oil) per cup of chips to thin the chocolate for a better dipping consistency.
Essential Equipment for Success
While this is a simple recipe, having the right tools makes the process faster, cleaner, and more enjoyable.
Must-Have Tools for 3-Ingredient No-Bake Oreo Balls
- Food Processor: This is the absolute best tool for crushing the Oreos into uniform, fine crumbs, which is essential for a smooth dough. If the crumbs are uneven, the final truffle texture will be gritty.
- Alternative Crushing Method: If a food processor isn’t available, use a large, heavy-duty zip-top bag and a rolling pin. Seal the bag tightly, remove the air, and roll/crush until the contents resemble fine sand. Be patient and ensure no large chunks remain.
- Large Mixing Bowl: Necessary for combining the large volume of crumbs and the cream cheese.
- Small Cookie Scoop (1 to 1.5 tablespoons capacity): Key for ensuring all your Oreo balls are uniform in size. Uniformity is important not only for aesthetics but also for consistent chilling and setting times.
- Baking Sheet and Parchment Paper or Wax Paper: The lined sheet prevents the balls from sticking and makes clean-up quick and easy. Wax paper is acceptable, but parchment paper is generally sturdier, especially when moving the finished, coated truffles.
- Microwave-Safe Bowl or Double Boiler: For melting the chocolate coating safely and effectively. A double boiler offers more precise temperature control, reducing the risk of overheating the chocolate.
- Dipping Tools:
- Specialized Candy Dipping Tools: These are highly recommended as they allow the excess chocolate to drain quickly.
- Forks or Skewers: A standard dinner fork works well if you carefully place the truffle between the prongs.
For more inspiration on easy, classic desserts that rely on simple ingredients and minimal effort, consider exploring recipes like Oreo Fudge or other quick no-bake treats.
Detailed Step-by-Step Instructions for Making No-Bake Oreo Balls
Follow these steps precisely to ensure your truffles have the perfect consistency, are easy to dip, and set beautifully.
Step 1: Crush the Oreo Cookies to Fine Perfection (The Foundation)
The first step determines the final texture of your 3-Ingredient No-Bake Oreo Balls. Place the entire contents of the Oreo package wafers and cream filling into the food processor. Process the cookies on high speed for 30 to 60 seconds. You are looking for a very fine, uniform texture, similar to fine sand or powdered sugar. It is critical that there are no large or chunky pieces left, as these will prevent the dough from becoming smooth and pliable. If using a bag and rolling pin, seal the bag and gently roll and smash the cookies until only dust remains.
Step 2: Combine Crumb and Cream Cheese (Achieving Truffle Dough)
Transfer the fine Oreo crumbs into a large mixing bowl. Add the fully softened block of cream cheese. If your cream cheese is still slightly cool, microwave it for 10 seconds to help soften it further, but be careful not to melt it. Use a sturdy spatula, a wooden spoon, or an electric mixer on low speed to begin combining the two ingredients. This mixing stage requires patience; it may look dry at first, but keep mixing until the cream cheese is fully incorporated. The final result should be a thick, dark brown, slightly shiny dough that is firm enough to roll without sticking excessively to your hands. The texture should resemble dense peanut butter or a rich, thick fudge.
Step 3: Scoop and Shape the Balls (Uniformity is Key)
Line a large baking sheet with parchment paper or wax paper. Using a small cookie scoop (1 to 1.5 tablespoons), scoop out uniform portions of the Oreo mixture. Rolling uniform balls ensures they all look professional and set up consistently. Roll each portion quickly between your palms to form smooth, round balls, aiming for about 1 inch in diameter. Place the formed balls onto the prepared baking sheet, leaving a small gap between them.
Step 4: Chill the Balls (The Essential Hardening Phase)
This is arguably the most essential step in making successful 3-Ingredient No-Bake Oreo Balls. Place the baking sheet containing the formed Oreo balls into the refrigerator. Chill the balls for a minimum of 30 minutes, or preferably up to 2 hours. This chilling step is vital because the cold temperature firms up the cream cheese and the oils in the cookies, hardening the balls. If the balls are not sufficiently chilled, they will fall apart or melt into the warm chocolate during the dipping process, leading to a huge mess and seized chocolate.
Step 5: Melt the Chocolate Coating (Smooth and Silky)
While the balls are chilling, prepare your coating. Place the chocolate melting wafers or chocolate chips into a dry, microwave-safe bowl. Microwave the chocolate in 30-second intervals. Stir thoroughly after every 30-second burst, even if the chocolate does not look fully melted. Stirring distributes the heat and prevents scorching. Continue until the chocolate is smooth, fully melted, and has no lumps. If using a double boiler, melt the chocolate over gently simmering water, ensuring the bottom of the bowl does not touch the water. Keep the heat low and stir gently for a gradual, controlled melt. If the chocolate is too thick, stir in 1 teaspoon of coconut oil to thin it slightly.
Step 6: Dip and Coat (The Art of the Truffle)
Remove the chilled Oreo balls from the refrigerator. Work quickly, as the balls will soften as they sit at room temperature. Using a dipping fork or specialized tool, completely submerge one ball at a time into the melted chocolate. Lift the ball out and tap the fork gently against the side of the bowl to allow any excess chocolate coating to drip back into the bowl. The coating should be thin, even, and cover the entire truffle. Avoid swirling the ball in the chocolate unnecessarily, which can warm it up too fast.
Step 7: Final Set and Decorate (The Finishing Touch)
Carefully transfer the coated Oreo ball back onto the parchment-lined baking sheet. Repeat the dipping process until all balls are coated. Once a truffle is coated, you must decorate it immediately before the chocolate sets. Options include:
- Sprinkling with additional fine Oreo crumbs.
- Adding festive sprinkles or sanding sugar.
- Drizzling contrasting melted chocolate (like white chocolate) across the top.
Step 8: Store and Serve (Enjoying the Labor)
Allow the chocolate coating to fully harden. This can take about 1 to 2 hours at cool room temperature. For faster setting, or if your kitchen is warm, you can place them back in the refrigerator for about 15 to 20 minutes. Once the coating is firm and hard to the touch, transfer the 3-Ingredient No-Bake Oreo Balls to an airtight container. These truffles must be stored in the refrigerator due to the cream cheese content. They will keep fresh for up to 1 week. Serve them slightly chilled for the best texture!
Tips, Troubleshooting, and Creative Variations
To master the 3-Ingredient No-Bake Oreo Balls and adapt them for any occasion, keep these expert tips and alternative ideas in mind.
Troubleshooting Common Mistakes
Even though this recipe is simple, a few common pitfalls can affect the outcome:
- The Dough is Too Sticky/Soft: This usually happens if the cream cheese wasn’t completely softened (which results in over-mixing to compensate) or if you used reduced-fat cream cheese. If the dough is too sticky to roll, add 1-2 tablespoons of finely crushed Oreos (or graham crackers) to absorb excess moisture. Alternatively, wrap the dough and chill it for 15 minutes before rolling.
- The Balls Fall Apart During Dipping: This is a sign that the balls were not sufficiently chilled. If you notice melting or cracking when dipping, stop immediately. Put the balls back into the freezer for 15-20 minutes to re-solidify them.
- The Chocolate Seizes (Becomes Thick and Grainy): This occurs when even a tiny drop of water or steam gets into the melted chocolate, or if the chocolate is overheated. If it seizes, you can sometimes rescue it by stirring in 1 teaspoon of neutral oil (like vegetable oil) or shortening until it loosens slightly, but it won’t be as smooth as before. Always use a dry bowl and be careful of steam when using a double boiler.
- The Chocolate Coating is Too Thick: If the chocolate is too heavy, the coating will be gloopy, obscuring the truffle shape. If using chocolate chips, stir in 1-2 teaspoons of neutral oil (or coconut oil) to thin the consistency. Wafers usually melt thinner, but if they thicken as they cool, microwave for 10 seconds and stir vigorously.
Flavor and Ingredient Variations
While the classic 3-Ingredient No-Bake Oreo Balls are perfect, don’t hesitate to play with the recipe base:
Seasonal Flavors:
- Peppermint Truffles: Use Peppermint Oreos or stir 1/2 teaspoon of pure peppermint extract into the cream cheese mixture. Coat in dark chocolate and sprinkle with crushed candy canes.
- Pumpkin Spice Truffles: Use Golden Oreos and add 1 teaspoon of pumpkin pie spice to the mixture. Coat in white chocolate and sprinkle with cinnamon sugar.
- Lemon Delight: Use Golden Oreos and add the zest of one lemon to the mixture for a bright, refreshing twist.
Dietary Modifications:
- Gluten-Free Oreo Balls: Use certified gluten-free sandwich cookies (many major brands offer excellent GF versions). The recipe ratio remains the same.
- Vegan Oreo Balls: Use accidentally vegan Oreos (check the current ingredients list, as core Oreos are often dairy-free) and substitute the cream cheese with a high-quality vegan cream cheese block (ensure it is firm, not whipped). Use vegan chocolate melting wafers for the coating.
Coating Alternatives:
Instead of traditional milk or dark chocolate, elevate your presentation by using:
- White Chocolate: Excellent for coloring with oil-based food coloring for themed parties (pink for Valentine’s, green for St. Patrick’s Day).
- Colored Candy Melts: Available in every color imaginable, these are perfect for bright, festive presentations.
For more great seasonal recipes and presentation ideas, be sure to follow my recipe inspiration board on Pinterest.
Nutritional Values and Indulgence Benefits
The 3-Ingredient No-Bake Oreo Balls are an indulgent dessert, rich in flavor, texture, and energy. While they are a treat, understanding their components allows you to enjoy them mindfully.
A Note on Nutritional Content
It is important to note that specific nutritional data will vary based on the size of your balls and the exact type of chocolate coating used (milk chocolate, dark chocolate, or candy melts). Based on approximately 48 standard-sized truffles (1 inch diameter), a single serving (1 truffle) generally contains the following approximate values:
Approximate Nutritional Profile (Per 1-inch Ball):
- Calories: 80–100 kcal
- Total Fat: 5–7 g
- Saturated Fat: 3–4 g
- Cholesterol: 5–10 mg
- Sodium: 25–40 mg
- Total Carbohydrates: 8–10 g
- Dietary Fiber: 0.2 g
- Sugars: 6–8 g
- Protein: 1 g
These values highlight that the 3-Ingredient No-Bake Oreo Balls are primarily a source of carbohydrates and fats, making them an excellent high-energy treat designed for enjoyment and satisfaction. They provide a quick burst of energy thanks to the sugars in the cookies and coating.
The Benefits of Simple Indulgence
In the context of a balanced diet, treats like these truffles offer several non-nutritional but equally important benefits:
- Portion Control: Because they are rolled into small, individual balls, they naturally encourage moderation. You can easily decide to enjoy just one or two, making them a safer option than cutting a large cake.
- Emotional Well-being: The act of making and sharing delicious desserts is strongly linked to happiness and social connection. The high satisfaction level derived from the rich chocolate and cream cheese filling makes them a perfect comfort food.
- The Power of Cream Cheese: While rich, cream cheese provides a smooth source of dairy fat, which is essential for texture and flavor release. Using a full-fat product ensures the creamiest, most luxurious filling possible, which is key to achieving that authentic truffle experience.
By focusing on high-quality ingredients and mindful preparation, these No-Bake Oreo Balls allow you to enjoy a decadent dessert experience with minimal fuss, maximizing satisfaction while maintaining easy portion management.
Frequently Asked Questions About 3-Ingredient No-Bake Oreo Balls
How long do 3-Ingredient No-Bake Oreo Balls last, and how should I store them?
Since these truffles contain cream cheese, they must be stored in an airtight container in the refrigerator. When properly chilled, they will last for up to 1 week. If you need to store them longer, they freeze exceptionally well; place them in a freezer-safe bag or container for up to 2 months, thawing overnight in the refrigerator before serving.
Can I use low-fat cream cheese for this recipe?
It is highly recommended to use full-fat cream cheese for the best results. Low-fat or reduced-fat cream cheese often contains higher water content, which can make the truffle dough overly sticky and difficult to roll and hold its shape. If you must use a lighter version, you may need to add an extra tablespoon or two of crushed Oreo crumbs to absorb the moisture.
Do I have to use a food processor to crush the Oreos?
No, a food processor is not strictly required, though it is the easiest method to achieve fine crumbs. You can place the cookies in a heavy-duty zip-top bag and use a rolling pin or meat tenderizer to crush them. The key requirement is ensuring the crumbs are uniformly fine, resembling sand, as large chunks will lead to a gritty, crumbly dough that won’t roll well.
My melted chocolate is too thick for dipping; how can I fix it?
If your chocolate is too thick, it likely needs to be slightly thinned. Stir in 1 to 2 teaspoons of vegetable shortening (like Crisco) or coconut oil per cup of melted chocolate. This will thin the chocolate consistency without altering the flavor significantly, allowing for a smooth and thin coating on your 3-Ingredient No-Bake Oreo Balls.
Can I make these No-Bake Oreo Balls ahead of time for the holidays?
Absolutely! This recipe is ideal for advance preparation. You can roll the balls (Step 3) and freeze them for up to a month before dipping. Alternatively, you can complete the truffles entirely and store them in the refrigerator for up to a week, or freeze the finished product for up to two months. They hold their shape and flavor beautifully.
Conclusion: The Effortless Joy of the 3-Ingredient No-Bake Oreo Balls
How long do 3-Ingredient No-Bake Oreo Balls last, and how should I store them?
Since these truffles contain cream cheese, they must be stored in an airtight container in the refrigerator. When properly chilled, they will last for up to 1 week. If you need to store them longer, they freeze exceptionally well; place them in a freezer-safe bag or container for up to 2 months, thawing overnight in the refrigerator before serving.
Can I use low-fat cream cheese for this recipe?
It is highly recommended to use full-fat cream cheese for the best results. Low-fat or reduced-fat cream cheese often contains higher water content, which can make the truffle dough overly sticky and difficult to roll and hold its shape. If you must use a lighter version, you may need to add an extra tablespoon or two of crushed Oreo crumbs to absorb the moisture.
Do I have to use a food processor to crush the Oreos?
No, a food processor is not strictly required, though it is the easiest method to achieve fine crumbs. You can place the cookies in a heavy-duty zip-top bag and use a rolling pin or meat tenderizer to crush them. The key requirement is ensuring the crumbs are uniformly fine, resembling sand, as large chunks will lead to a gritty, crumbly dough that won’t roll well.
My melted chocolate is too thick for dipping; how can I fix it?
If your chocolate is too thick, it likely needs to be slightly thinned. Stir in 1 to 2 teaspoons of vegetable shortening (like Crisco) or coconut oil per cup of melted chocolate. This will thin the chocolate consistency without altering the flavor significantly, allowing for a smooth and thin coating on your 3-Ingredient No-Bake Oreo Balls.
Can I make these No-Bake Oreo Balls ahead of time for the holidays?
Absolutely! This recipe is ideal for advance preparation. You can roll the balls (Step 3) and freeze them for up to a month before dipping. Alternatively, you can complete the truffles entirely and store them in the refrigerator for up to a week, or freeze the finished product for up to two months. They hold their shape and flavor beautifully.
The journey to creating the perfect truffle doesn’t need to be paved with complexity and endless lists of specialized ingredients. The secret to these irresistible treats lies in their elegant simplicity: three staple ingredients combined through a straightforward, no-bake process. We’ve covered every facet of making these delightful confectionery bites, from the importance of achieving fine, sandy crumbs to the essential step of chilling your dough sufficiently before coating.
These 3-Ingredient No-Bake Oreo Balls truly live up to their reputation, offering a rich, velvety, and intensely satisfying experience that belies the minimal effort required. They are the ideal solution for last-minute entertaining, easy homemade gifts, or simply satisfying that craving for something decadent and chocolatey. Their versatility allows for endless customization, ensuring they can be adapted to any theme, holiday, or preference, making them a true culinary blank canvas.
Now that you are armed with the detailed steps, expert tips, and troubleshooting advice, there’s nothing stopping you from mastering this classic recipe. So, pull out those Oreos, let that cream cheese soften, and get ready to create a batch of the easiest, most delicious truffles you’ve ever tasted. Don’t forget to experiment with seasonal variations or colored coatings to make your batch uniquely yours. We highly encourage you to give these 3-Ingredient No-Bake Oreo Balls a try and share your results! Let us know in the comments which topping you chose did you stick with the classic chocolate, or did you venture into the world of festive sprinkles?
3-Ingredient No-Bake Oreo Balls Recipe: Easy Chocolate Truffles
Ingredients
Equipment
Method
- Place the entire contents of the Oreo package (cookies and filling) into a food processor. Process the cookies on high speed until they are finely ground into uniform crumbs, resembling fine sand. If you do not have a food processor, crush the cookies thoroughly in a heavy-duty plastic bag using a rolling pin.
- Transfer the fine Oreo crumbs into a large mixing bowl. Add the fully softened cream cheese. Use a sturdy spatula or electric mixer on low speed to thoroughly combine the mixture until a thick, truffle-like dough is formed that holds its shape when rolled.
- Line a large baking sheet with parchment paper or wax paper. Using a small cookie scoop, portion out uniform amounts. Roll the portions between your palms to form smooth, round balls, approximately 1 inch in diameter. Place the formed balls onto the prepared baking sheet.
- Place the baking sheet containing the Oreo balls into the refrigerator. Chill the balls for a minimum of 30 minutes, or up to 2 hours. This chilling step is essential as it hardens the balls, making them firm and easy to dip in warm chocolate.
- Melt the Chocolate Coating: Place the chocolate melting wafers into a microwave-safe bowl. Microwave the chocolate in 30-second intervals, stirring thoroughly after each interval, until the chocolate is smooth, fully melted, and lump-free. Alternatively, use a double boiler for melting.
- Remove the chilled Oreo balls from the refrigerator. Using a dipping fork or specialized tool, completely submerge one ball at a time into the melted chocolate. Tap the fork gently against the side of the bowl to allow any excess coating to drip off, ensuring the coating is thin and even.
- Place the coated Oreo ball back onto the parchment-lined baking sheet. Repeat the dipping process until all balls are coated. If desired, immediately sprinkle the tops with additional Oreo crumbs, sprinkles, or a contrasting drizzle of white chocolate before the coating sets.
- Allow the chocolate coating to fully harden. This can take about 1 to 2 hours at cool room temperature, or about 15 to 20 minutes if placed back in the refrigerator. Once the coating is firm, transfer the Oreo balls to an airtight container. Store the No-Bake Oreo Balls in the refrigerator for up to 1 week.