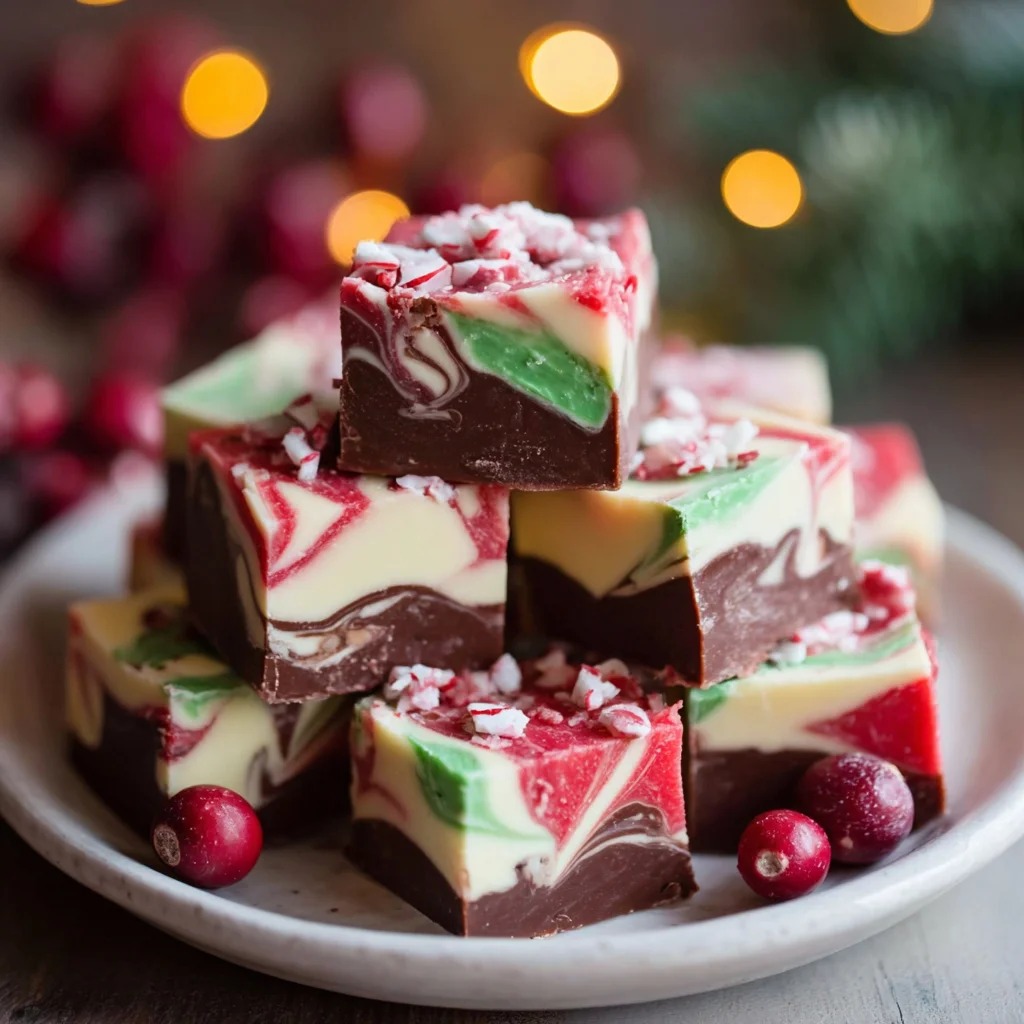
The holiday season is upon us, and what better way to celebrate than with a batch of decadent, homemade fudge? This recipe for The Joy of Christmas Fudge is a delightful combination of creamy, rich chocolate and festive additions that will make your taste buds sing. Forget the store-bought stuff – this recipe is easy to follow, incredibly satisfying to make, and results in a fudge so delicious, it’s guaranteed to become a new holiday tradition. Imagine the warm aroma of melting chocolate filling your kitchen, the satisfying swirl of the spoon as you mix the ingredients, and finally, the joy of sharing this sweet treat with loved ones. This isn’t just a recipe; it’s an experience, a celebration of the season captured in every bite. So gather your ingredients, put on some festive music, and let’s embark on this joyous fudge-making adventure!
Why You’ll Love This Recipe
This Christmas Fudge recipe is more than just a dessert; it’s a delightful journey into the heart of holiday baking. What makes it truly special? Let’s delve into the reasons why you’ll adore this recipe:
- Unbelievably Easy: Forget complicated techniques and lengthy instructions. This fudge recipe is incredibly straightforward, even for novice bakers. You’ll be surprised how quickly it comes together.
- Rich and Decadent Flavor: The combination of creamy butter, sweetened condensed milk, and rich chocolate chips creates a truly decadent and irresistible flavor profile. It’s the perfect balance of sweetness and chocolatey goodness.
- Customizable Festive Flair: Want to add a touch of holiday magic? The optional ingredients pecans, marshmallows, and sprinkles allow you to personalize your fudge to perfectly match your Christmas décor and preferences. Feel free to experiment!
- Makes a Stunning Gift: Beautifully packaged, this fudge makes a thoughtful and delicious homemade gift for friends, family, neighbors, or colleagues. It’s a present that’s sure to impress and delight.
- No-Bake Convenience: No oven required! This fudge is a no-bake recipe, making it perfect for those hot summer days or when you want a quick and easy dessert without heating up the kitchen.
- Keeps Well: This fudge stores beautifully in the refrigerator, meaning you can enjoy it for days (if it lasts that long!). This makes it ideal for making ahead of time for parties or gatherings.
- Perfect for Any Skill Level:** Whether you’re a seasoned baker or a complete beginner, you’ll find this recipe easy to follow and incredibly rewarding. The simple instructions and clear explanations make it accessible to everyone.
Beyond the ease and deliciousness, making this fudge is a wonderful way to connect with the spirit of Christmas. The process itself is therapeutic and enjoyable, offering a moment of peace and calm amidst the holiday bustle. The final result? A sweet treat that perfectly encapsulates the warmth and joy of the season. Isn’t that what Christmas is all about?
Why You Should Try This Recipe
In a world of pre-packaged sweets, there’s something truly special about making your own treats from scratch. This Christmas fudge recipe isn’t just about deliciousness; it’s about creating a memorable experience. Here’s why you should give it a try:
- Superior Quality Ingredients: You control the quality of every ingredient, ensuring a superior flavor and texture compared to store-bought fudge. This allows you to choose high-quality chocolate and other ingredients that suit your taste.
- A Sense of Accomplishment: There’s a profound sense of satisfaction that comes with creating something delicious from scratch. This recipe provides a simple yet rewarding baking experience.
- Cost-Effective: Homemade fudge is often more economical than buying similar quality fudge from a store, especially during the holiday season when prices may rise.
- Perfect for Gifting and Sharing: Homemade gifts are always more thoughtful and personal. This fudge is a fantastic way to show your love and appreciation to friends and family. Sharing the joy of baking is just as rewarding as enjoying the fudge itself!
- A Delicious Holiday Tradition: Make this fudge an annual tradition! It’s a delightful way to build holiday memories with your loved ones. The ritual of making and sharing this fudge will become a cherished part of your Christmas celebrations.
- Adaptable to Your Preferences: Customize it! This recipe allows for plenty of personal touches, whether you prefer pecans or walnuts, mini marshmallows or a sprinkle of sea salt.
- Impress Your Guests: Serve this decadent fudge at your next holiday gathering and watch your guests rave about its rich and delightful flavor. It’s a guaranteed crowd-pleaser.
Ultimately, this recipe is an invitation to savor the simple pleasures of the holiday season. It’s a chance to slow down, create something beautiful, and share the warmth of homemade goodness with those you cherish. Try it – you won’t regret it!
Ingredients and Necessary Utensils
Gathering the right ingredients and utensils is crucial for a smooth and successful fudge-making experience. Let’s break down what you’ll need, paying close attention to detail.
Ingredients: A Detailed List for The Joy of Christmas Fudge
- 1 cup (2 sticks) unsalted butter: Unsalted butter allows you to control the saltiness of the fudge. Using salted butter might make it too salty. Look for high-quality butter for the best flavor.
- 1 (14-ounce) can sweetened condensed milk: This is the key to the creamy texture of the fudge. Make sure the can is unopened and not dented.
- 12 ounces semi-sweet chocolate chips: Your choice of brand influences the flavor. High-quality chocolate chips will result in a richer and more decadent fudge. Consider using baking chocolate for an even more intense chocolate flavor.
- 6 ounces white chocolate chips: This adds a delightful contrast in flavor and texture, creating a beautiful marbled effect. Again, high-quality white chocolate is recommended.
- 1 teaspoon vanilla extract: Pure vanilla extract is always best. It significantly enhances the overall flavor of the fudge.
- 1/2 cup chopped pecans or walnuts (optional): Adds a delightful crunch and nutty flavor. Toasting the nuts before adding them will enhance their flavor.
- 1/4 cup mini marshmallows (optional): These create a fun, chewy texture and a touch of extra sweetness. Marshmallow creme could also be used as an alternative.
- Red and green sprinkles (optional): These add a festive touch and visual appeal, especially for Christmas gatherings. Choose sprinkles that are of good quality and won’t bleed color into the fudge.
Recommended Tools and Utensils
- 8×8 inch baking pan: This size is perfect for this recipe, ensuring a nice, thick layer of fudge.
- Parchment paper: Essential for easy removal of the fudge from the pan. Ensure the parchment paper extends beyond the edges of the pan for easy lifting.
- Large, heavy-bottomed saucepan: This prevents the butter from burning while melting and ensures even heating. A double boiler can also be used.
- Wooden spoon or spatula: Use a heat-resistant spatula for stirring the fudge. A wooden spoon is ideal because it distributes heat evenly.
- Rubber spatula or scraper: Helpful for scraping down the sides of the pan and ensuring all ingredients are incorporated.
- Measuring cups and spoons: Accurate measuring is crucial for the best results. Use measuring tools specifically designed for dry and liquid ingredients.
- Cutting board and sharp knife: For cutting the fudge into squares once it’s set. A sharp knife ensures clean cuts.
Detailed Recipe Steps for The Joy of Christmas Fudge
Let’s embark on the delicious journey of creating The Joy of Christmas Fudge. Follow these step-by-step instructions for a perfect result.
- Prepare the Pan: Line your 8×8 inch baking pan with parchment paper, ensuring the paper extends beyond the edges of the pan. This will make removing the fudge much easier later. Crucial: Leave about 2 inches of overhang on all sides.
- Melt the Butter: Melt the butter in a large, heavy-bottomed saucepan over medium-low heat. Stir frequently to prevent burning. Tip: Use medium-low heat throughout the process to avoid scorching the butter or chocolate.
- Add Sweetened Condensed Milk: Once the butter is completely melted, add the sweetened condensed milk. Stir continuously until the mixture is completely smooth and well-combined. Important: Make sure there are no lumps of butter remaining.
- Melt the Semi-Sweet Chocolate: Remove the pan from the heat. Add the semi-sweet chocolate chips to the warm mixture and stir until they are completely melted and the mixture is smooth and glossy. Stir in the vanilla extract. Tip: If the chocolate isn’t melting smoothly, return the pan to very low heat for a few seconds and stir continuously. Don’t overheat.
- Melt the White Chocolate: Add the white chocolate chips and stir until completely melted and incorporated into the fudge base. The mixture should be smooth and have a beautiful marbled appearance. Tip: For a more pronounced marbling effect, gently swirl the white chocolate into the semi-sweet chocolate rather than stirring vigorously.
- Add Optional Ingredients (if using): Gently stir in the chopped nuts, mini marshmallows, and sprinkles (if using). Be careful not to overmix, as this can cause the marshmallows to melt too much or the fudge to become too airy.Note: Add nuts first, then marshmallows (if using), and finally sprinkles for best results.
- Pour and Spread: Pour the fudge mixture into the prepared baking pan and spread it evenly using a spatula or the back of a spoon.Tip: For a perfectly smooth top, use a spatula to smooth out the surface of the fudge after pouring it into the pan.
- Refrigerate: Refrigerate the fudge for at least 2 hours, or until it is completely firm. Important: The longer you refrigerate it, the firmer the fudge will be. Overnight refrigeration is ideal.
- Cut and Serve: Once the fudge is firm, lift it out of the pan using the parchment paper overhang. Cut it into small squares and serve. Tip: For clean cuts, wipe your knife with a damp cloth after each cut to prevent sticking.
Tips and Variations for The Joy of Christmas Fudge
Here are some handy tips to perfect your fudge and exciting variations to explore:
- Prevent Sugar Crystals: Make sure your saucepan is clean and free of any sugar crystals before starting. Sugar crystals can interfere with the smooth melting of the chocolate.
- Don’t Overheat: Keep the heat low throughout the process to prevent burning the butter or scorching the chocolate.
- High-Quality Ingredients: The quality of your ingredients directly impacts the taste of your fudge. Use good quality chocolate and butter for the best flavor.
- Nut Variations: Experiment with different types of nuts, such as almonds, hazelnuts, or pistachios. You can also use a combination of nuts.
- Spice it Up: Add a pinch of cinnamon, nutmeg, or peppermint extract for a festive twist on the classic flavor profile.
- Sea Salt: Sprinkle a little sea salt on top of the fudge before refrigerating for a sweet and salty contrast.
- Chocolate Variations: Explore different types of chocolate chips, such as dark chocolate, milk chocolate, or even a combination of all three.
- Vegan Fudge: Substitute the butter with vegan butter and the milk with full-fat coconut milk. Use vegan chocolate chips.
- Gluten-Free Fudge: This recipe is naturally gluten-free, as long as you use gluten-free chocolate chips (check the label).
Remember, the beauty of this recipe lies in its adaptability. Feel free to experiment and create your own unique variations of The Joy of Christmas Fudge.
Nutritional Values and Benefits
While indulgence is a key part of the holiday season, it’s also good to be mindful of what we’re consuming. Let’s look at the nutritional breakdown of this recipe and the potential benefits of some of its ingredients (per serving, assuming 16 squares):
Note: The nutritional information below is an approximation and can vary based on the specific brands and types of ingredients used.
- Calories: Approximately 250-300 calories per serving
- Fat: Primarily from butter and chocolate. Fats provide energy and help with the absorption of fat-soluble vitamins.
- Carbohydrates: Primarily from sweetened condensed milk and chocolate chips. Carbohydrates provide energy.
- Protein: Relatively low in protein.
- Nuts (if added): Provide healthy fats, fiber, and vitamins. Nuts also contribute a delicious crunch and rich flavor.
- Dark Chocolate (if used): Contains antioxidants which may have health benefits.
It’s important to enjoy The Joy of Christmas Fudge in moderation as part of a balanced diet. It’s a treat to be savored, not consumed in excess. The added nuts and potential use of dark chocolate can slightly boost the nutritional profile, adding some healthy fats and antioxidants.
FAQs
How long does The Joy of Christmas Fudge last?
Can I make The Joy of Christmas Fudge ahead of time?
What can I substitute for pecans or walnuts in The Joy of Christmas Fudge?
Is this Christmas Fudge recipe suitable for freezing?
Can I use different types of chocolate in The Joy of Christmas Fudge?
Conclusion: The Sweetest Part of Your Christmas
This recipe for The Joy of Christmas Fudge is more than just instructions; it’s a pathway to creating a cherished holiday memory. The ease of the recipe, the rich flavors, and the endless possibilities for customization make it a perfect addition to your Christmas celebrations. From the simple act of melting chocolate to the joy of sharing the finished product, every step brings you closer to the true spirit of the season. So, gather your ingredients, put on your apron, and experience the joy of creating this delicious and festive treat. Don’t forget to share your experiences and photos in the comments below! And don’t forget to check out more delightful recipes on our blog and follow us on Pinterest for more inspiration! Happy baking!
The Joy of Christmas Fudge
Ingredients
Equipment
Method
- Line an 8x8 inch baking pan with parchment paper, leaving an overhang on the sides for easy removal. Set aside.
- Melt butter in a large, heavy-bottomed saucepan over medium-low heat. Stir frequently to prevent burning.
- Add sweetened condensed milk and stir until well combined and smooth.
- Remove from heat and stir in semi-sweet chocolate chips until completely melted and smooth. Stir in vanilla extract.
- Stir in white chocolate chips until melted and the mixture is well combined.
- Optional: Gently fold in nuts, marshmallows, and sprinkles.
- Pour fudge mixture into the prepared pan and spread evenly.
- Refrigerate for at least 2 hours, or until firm. Lift the fudge out using the parchment paper overhang, cut into squares, and enjoy!