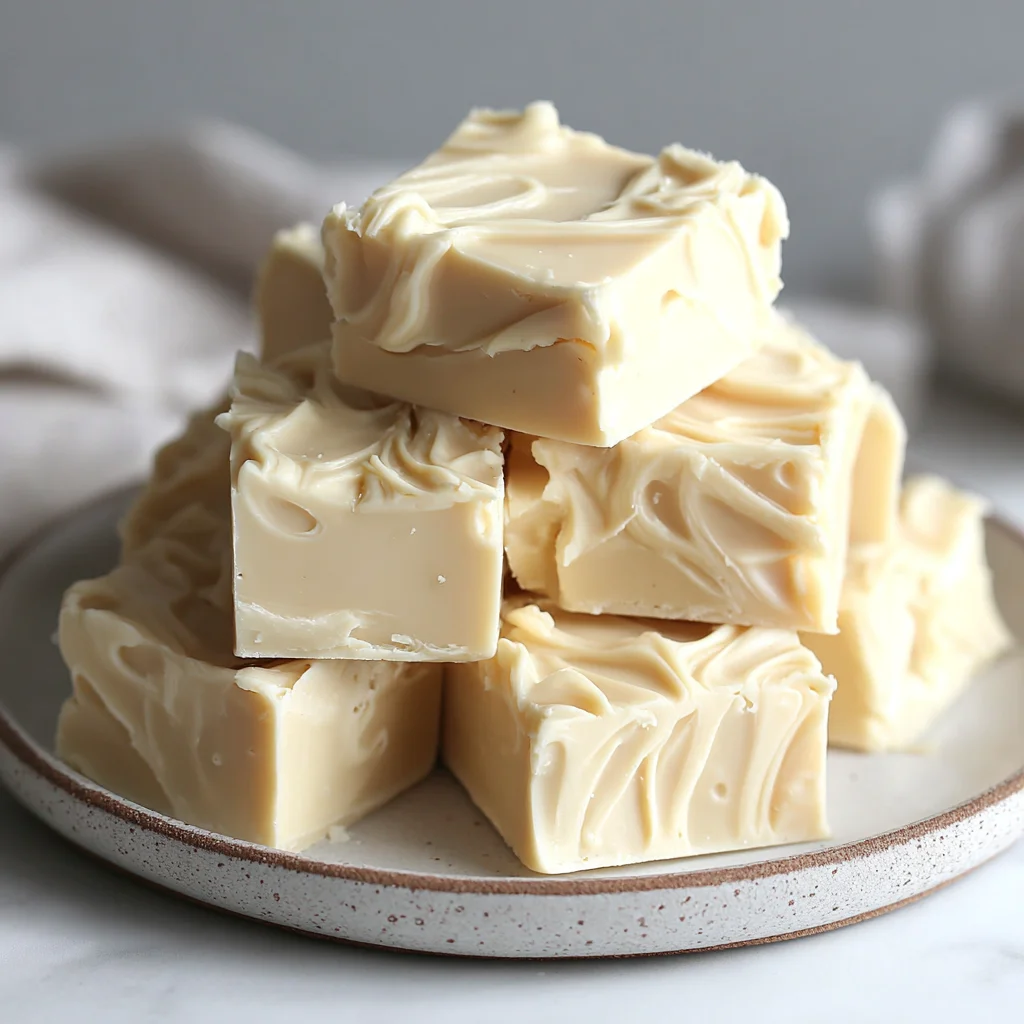
Indulge in the creamy, dreamy goodness of homemade white chocolate fudge! This easy recipe delivers a melt-in-your-mouth experience that will satisfy even the most discerning sweet tooth. Forget those store-bought versions packed with artificial ingredients; this recipe uses simple, high-quality ingredients to create a rich and decadent treat that’s perfect for sharing (or not!). From holiday gatherings to cozy nights in, this white chocolate fudge is a guaranteed crowd-pleaser, and its simple preparation makes it the ideal dessert for bakers of all skill levels. Prepare to be amazed by the ease and incredible flavor of this recipe – it’s a guaranteed winner!
Why You’ll Love This White Chocolate Fudge Recipe
This white chocolate fudge recipe isn’t just easy; it’s transformative. It elevates the humble white chocolate chip into a luxurious confection, a testament to the power of simple ingredients expertly combined. What truly sets this recipe apart is its versatility. It’s the perfect base for customization. Imagine the possibilities: a swirl of rich caramel, crunchy pecans adding a satisfying texture contrast, or a vibrant burst of colorful sprinkles adding a festive touch. The possibilities are truly endless.
But beyond the customization, this recipe offers a level of control you just can’t get with store-bought fudge. You know exactly what’s going into your treat – high-quality white chocolate, creamy sweetened condensed milk, and real butter. This recipe is incredibly forgiving; slight variations in ingredients or microwave times won’t drastically affect the outcome. Even if you’re a novice baker, you’ll be able to achieve perfectly smooth and creamy results. And the best part? Cleanup is a breeze, thanks to the clever use of parchment paper.
This white chocolate fudge isn’t just a dessert; it’s an experience. The smooth, creamy texture melts on your tongue, leaving a lingering sweetness that’s perfectly balanced. This isn’t just a recipe; it’s a pathway to creating cherished memories. Whether you’re sharing it with loved ones during the holidays or surprising a friend with a small, sweet gift, this white chocolate fudge is guaranteed to leave a lasting impression. It’s the kind of dessert that people will rave about long after the last piece is gone. The simple elegance and delicious flavor are sure to elevate any occasion.
Why You Should Try This Easy White Chocolate Fudge Recipe
In a world of complicated baking projects, this White Chocolate Fudge recipe offers a refreshing change of pace. It’s a recipe that truly lives up to its name: easy. It requires minimal ingredients, readily available in most grocery stores, and requires little to no specialized baking equipment. This means you can whip up a batch on a whim, perfect for spontaneous dessert cravings or last-minute gift-giving.
This recipe empowers you to create something truly special without the stress and pressure of intricate baking techniques. It’s about quality ingredients and simple methodology. The result is a luxurious treat that’s surprisingly simple to make. The creamy texture, the perfectly balanced sweetness, the satisfying melt-in-your-mouth experience – it all comes together effortlessly. This recipe is a testament to the idea that sometimes, the simplest things are the best. It’s a recipe that’s perfect for beginners, yet still impressive enough to wow experienced bakers. It’s a testament to the power of simple perfection.
Moreover, this White Chocolate Fudge recipe is a great way to spend some quality time in the kitchen. The process is relaxing and meditative, allowing you to unwind and de-stress while creating a delicious treat. It’s a great activity for a rainy afternoon or a fun project to do with family or friends. The sense of accomplishment after creating a batch of this delectable fudge is incredibly rewarding. So why not give it a try? You’ll be amazed at how easy it is to create something so delicious and impressive.
Ingredients and Necessary Utensils for White Chocolate Fudge
This section details the necessary ingredients and equipment to make this delectable White Chocolate Fudge recipe. High-quality ingredients are essential to achieving the best flavor and texture, so select your ingredients accordingly. The equipment needed is minimal, making this recipe accessible to everyone. Let’s dive into the details!
Ingredients: A Detailed Look
- White Chocolate Chips (14 ounces/397g): The star of the show! Choose high-quality white chocolate chips for the best flavor and melt. Brands like Ghirardelli or Guittard are excellent choices. Avoid using chocolate chips specifically designed for baking, as they may not melt as smoothly. White chocolate chips ensure consistent melting and a smoother final product.
- Sweetened Condensed Milk (14 ounces/397g): This provides the creamy base and sweetness. Make sure to use a full can of sweetened condensed milk for optimal results. Don’t substitute with evaporated milk; the sweetness and texture will be significantly different.
- Unsalted Butter (1/2 cup/1 stick): Adds richness and creaminess. Unsalted butter allows you to control the saltiness of the fudge. Using salted butter can overpower the sweetness of the white chocolate.
- Vanilla Extract (1 teaspoon): Enhances the flavor of the fudge. Use pure vanilla extract for the best taste. Artificial vanilla extract may not provide the same depth of flavor.
- Salt (Pinch): Balances the sweetness of the fudge. A pinch of salt enhances the overall flavor profile, bringing out the sweetness of the white chocolate.
- Optional Mix-ins (1/2 cup): Unleash your creativity! Chopped nuts (pecans, walnuts, almonds), sprinkles, dried fruit (cranberries, chopped cherries), or even cookie crumbs can be added for extra texture and flavor. The possibilities are endless! Consider seasonal ingredients for unique twists.
Utensils: Your Essential Tools
- Microwave-safe Bowl (Large): A large bowl is essential for melting the ingredients easily and preventing spills. Ensure it’s microwave-safe to prevent accidents.
- 8×8 inch Baking Dish: This is the standard size for this recipe. Using a smaller dish will result in thicker fudge, while a larger dish will result in thinner fudge.
- Parchment Paper: Essential for easy removal and cleanup! Line the baking dish with parchment paper, leaving an overhang on the sides for easy lifting.
- Rubber Spatula or Wooden Spoon: For stirring the melted chocolate mixture and incorporating mix-ins. A spatula ensures smooth incorporation of ingredients.
- Measuring Cups and Spoons: Accurate measurements are essential for baking. Using precise measurements ensures consistent and delicious results.
- Knife or Cutting Tool: For cutting the fudge into squares once it’s chilled. A sharp knife is ideal for clean cuts.
Detailed Recipe Steps for White Chocolate Fudge
This section walks you through the easy steps involved in making your delicious White Chocolate Fudge. Pay close attention to the details and tips provided to ensure a perfectly smooth and creamy outcome. Remember, precision is key to confectionary success!
Step 1: Prepare Your Baking Dish
Line an 8×8 inch baking dish with parchment paper. This crucial step simplifies removal and cleanup. Ensure that the parchment paper extends beyond the edges of the dish, providing easy handles for lifting the finished fudge. Proper lining prevents sticking and ensures clean edges.
Step 2: Melt the Ingredients
Combine white chocolate chips, butter, and sweetened condensed milk in a large microwave-safe bowl. Ensure all ingredients are thoroughly mixed before proceeding. Microwave in 30-second intervals, stirring after each, until the chocolate is completely melted and the mixture is smooth and creamy. Avoid overheating; grainy texture is a sign of overheating. If the mixture begins to seize, add a tablespoon of heavy cream and stir until smooth.
Step 3: Incorporate Flavorings and Mix-ins
Stir in the vanilla extract and a pinch of salt until thoroughly combined. The salt balances the sweetness. If using optional mix-ins (nuts, sprinkles, etc.), gently fold them in. Avoid overmixing, as this can create air pockets. Gentle folding ensures even distribution of add-ins without altering the creamy consistency.
Step 4: Pour and Chill
Pour the fudge mixture into the prepared 8×8 inch baking dish and spread evenly. A spatula helps to ensure an even layer. Refrigerate for at least 2 hours, or until firm enough to cut. Longer chilling times will result in a firmer fudge. Patience is key to achieving the perfect consistency.
Step 5: Cut and Serve
Once the fudge is firm, lift it out of the pan using the parchment paper overhang. Cut into small squares and serve. Enjoy your creamy, decadent, homemade White Chocolate Fudge! Store leftovers in an airtight container in the refrigerator for up to a week. The fudge will maintain its texture and flavor for optimal enjoyment.
Tips and Variations for Your White Chocolate Fudge
This section explores some useful tips and exciting variations to elevate your White Chocolate Fudge recipe to new heights of flavor and creativity. Explore alternative ingredients, personalize your fudge, and avoid common pitfalls for a consistently perfect result.
Ingredient Alternatives
- Dairy-Free Option: Substitute vegan white chocolate chips and vegan butter for a delicious dairy-free version.
- Nut-Free Fudge: Omit the nuts or substitute with other non-nut mix-ins like dried fruits or sprinkles.
- Flavor Variations: Experiment with different extracts like peppermint, almond, or orange. Add a pinch of cinnamon or espresso powder for a unique twist.
Avoiding Common Mistakes
- Overheating the Chocolate: This results in a grainy texture. Microwave in short bursts and stir frequently.
- Undermixing the Ingredients: This can leave clumps of chocolate and butter. Make sure all ingredients are thoroughly combined before adding mix-ins.
- Not Chilling Sufficiently: This can result in soft, difficult-to-cut fudge. Allow it to chill completely before cutting.
Creative Fudge Enhancements
- Swirled Fudge: Create a beautiful marbled effect by dividing the fudge mixture into two bowls and adding different mix-ins to each before layering in the baking dish.
- Layered Fudge: Prepare different flavored fudge bases (e.g., plain white chocolate and peppermint) and layer them in the baking dish for a visually stunning and delicious dessert.
- Fudge Truffles: Once the fudge is chilled, roll it into small balls and dip them in melted chocolate or sprinkles for a fancy presentation.
Nutritional Values and Benefits of White Chocolate Fudge
While this White Chocolate Fudge recipe is undeniably indulgent, let’s examine its nutritional components and the potential benefits of its main ingredients. Remember, moderation is key when enjoying treats like this.
Approximate Nutritional Information (per serving, assuming 16 squares): (Note: This is an estimate and can vary based on specific ingredients used.)
- Calories: Approximately 250-300
- Fat: 15-20g
- Saturated Fat: 10-15g
- Carbohydrates: 25-30g
- Sugar: 20-25g
- Protein: 2-3g
Ingredient Benefits:
- White Chocolate: Contains flavanols, antioxidants with potential health benefits (though the amount in white chocolate is lower than in dark chocolate). Provides a source of energy.
- Milk: (From sweetened condensed milk) Provides calcium, a crucial mineral for bone health. However, sweetened condensed milk is high in sugar.
- Butter: Provides fat-soluble vitamins like vitamin A and E. However, butter is high in saturated fat.
- Nuts (if added): Excellent source of healthy fats, protein, fiber, and various vitamins and minerals.
It’s important to remember that this is a treat and should be consumed in moderation as part of a balanced diet. The high sugar and fat content mean it’s not a daily food, but an occasional indulgence.
FAQs about White Chocolate Fudge
How long does white chocolate fudge last?
Can I use dark chocolate instead of white chocolate for this recipe?
What’s the best way to store leftover white chocolate fudge?
Can I make this white chocolate fudge ahead of time?
Is it possible to make this recipe vegan?
Conclusion: Indulge in Your Homemade White Chocolate Fudge
This easy white chocolate fudge recipe is a guaranteed winner! Its simple steps, versatile nature, and incredible flavor make it a perfect treat for any occasion. From holiday gatherings to cozy nights in, this recipe is sure to impress your friends and family. Remember to use high-quality ingredients for the best results. Don’t be afraid to experiment with different mix-ins to create your unique flavor combinations.
We encourage you to try this recipe and share your experience in the comments section below! Let us know your favorite mix-ins or any modifications you made. Also, don’t forget to share this recipe with your friends and family on social media – spread the joy of homemade white chocolate fudge! Happy baking!
For more delicious recipes, check out our other amazing dessert recipes on our blog: Cheesy Vegetable Casserole and Trenza de Hojaldre. And for even more inspiration, you can also find us on Pinterest!
Easy White Chocolate Fudge
Ingredients
Equipment
Method
- Line an 8x8 inch baking dish with parchment paper, leaving an overhang on the sides for easy removal.
- In a large microwave-safe bowl, combine white chocolate chips, butter, and sweetened condensed milk.
- Microwave in 30-second intervals, stirring well after each, until the chocolate is completely melted and the mixture is smooth and creamy. Avoid overheating.
- Stir in vanilla extract and salt until well combined. Gently fold in nuts (if using).
- Pour the fudge mixture into the prepared baking dish and spread evenly.
- Refrigerate for at least 2 hours, or until firm.
- Lift the fudge out of the pan using the parchment paper overhang. Cut into squares and serve.