Ingredients
Equipment
Method
STEP 1: PREPARE THE OREO BASE
- Place the entire package of Oreo cookies (including the cream filling) into the bowl of a food processor.
- Process the cookies on high speed until they are finely ground into a fine, uniform crumb. Ensure there are no large chunks remaining. If you do not have a food processor, crush them thoroughly using a rolling pin in a heavy-duty Ziploc bag.
- Reserve approximately 1/4 cup of the crushed cookie crumbs for later decoration, if desired.
STEP 2: MIX AND CHILL THE DOUGH
- Add the softened cream cheese to the bowl with the remaining crushed Oreo crumbs. Mix thoroughly until a uniform, thick dough forms. The mixture should be firm and easy to handle.
- Cover the bowl tightly with plastic wrap and transfer the dough to the refrigerator. Chill the dough for a minimum of 30 minutes, or up to 1 hour, to firm it up for easier rolling.
STEP 3: SHAPE AND FREEZE
- Line two large baking sheets with parchment paper or wax paper. Use a small cookie scoop (approx. 1 tablespoon size) or measure out the mixture to ensure uniformity.
- Roll the dough firmly between your palms to form smooth, dense balls. Place the rolled balls onto the prepared baking sheets.
- Place the baking sheets into the freezer for 15 to 20 minutes. This quick freeze helps the balls hold their shape and prevents them from melting when dipped in the warm chocolate.
STEP 4 & 5: MELT AND COAT
- Place the melting chocolate wafers or chips into a microwave-safe bowl. If using, add the shortening or coconut oil. Microwave in 30-second intervals, stirring thoroughly after each interval, until the chocolate is completely smooth and liquid. Do not overheat.
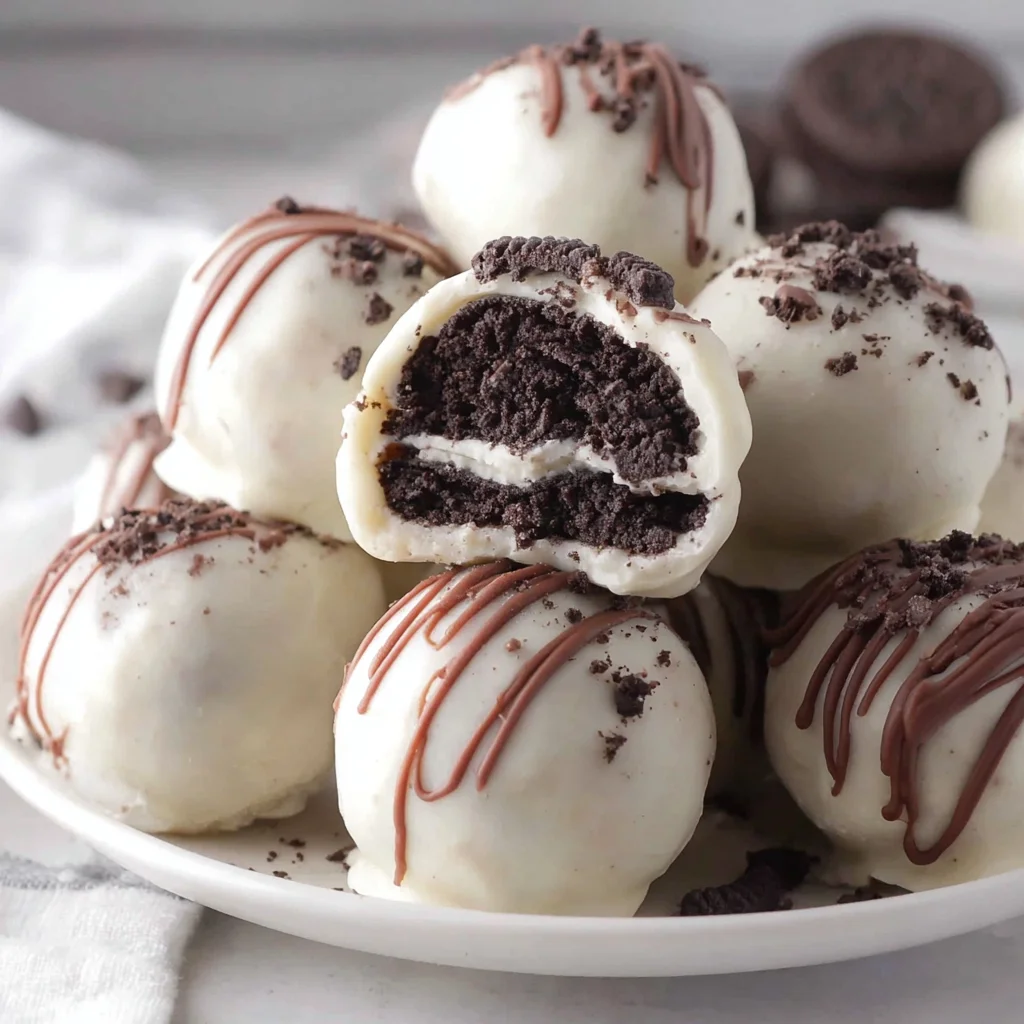
- Remove the chilled Oreo balls from the freezer. Using a toothpick or a dipping fork, immerse one ball fully into the melted chocolate. Tap the fork gently against the side of the bowl to allow excess chocolate to drip off.
- Carefully slide the coated ball onto the parchment-lined baking sheet. If adding sprinkles or crushed cookies, apply them immediately before the coating sets.
STEP 6: SET AND STORE
- Allow the coated cake balls to rest at room temperature until the chocolate coating is completely firm and set (approximately 1 to 2 hours). For a faster set, transfer them to the refrigerator for about 30 minutes.
- Store the finished Oreo Cake Balls in an airtight container in the refrigerator for up to 1 week. Serve chilled or at room temperature.
Notes
For best results, use high-quality melting wafers (like Ghirardelli or Merckens) as they melt smoother than typical chocolate chips. If you struggle with dipping, try placing the melted chocolate in a small, deep mug to ensure the entire ball can be immersed easily. Consider using flavor variations like peanut butter Oreos, mint Oreos, or coffee Oreos for different truffle flavors.